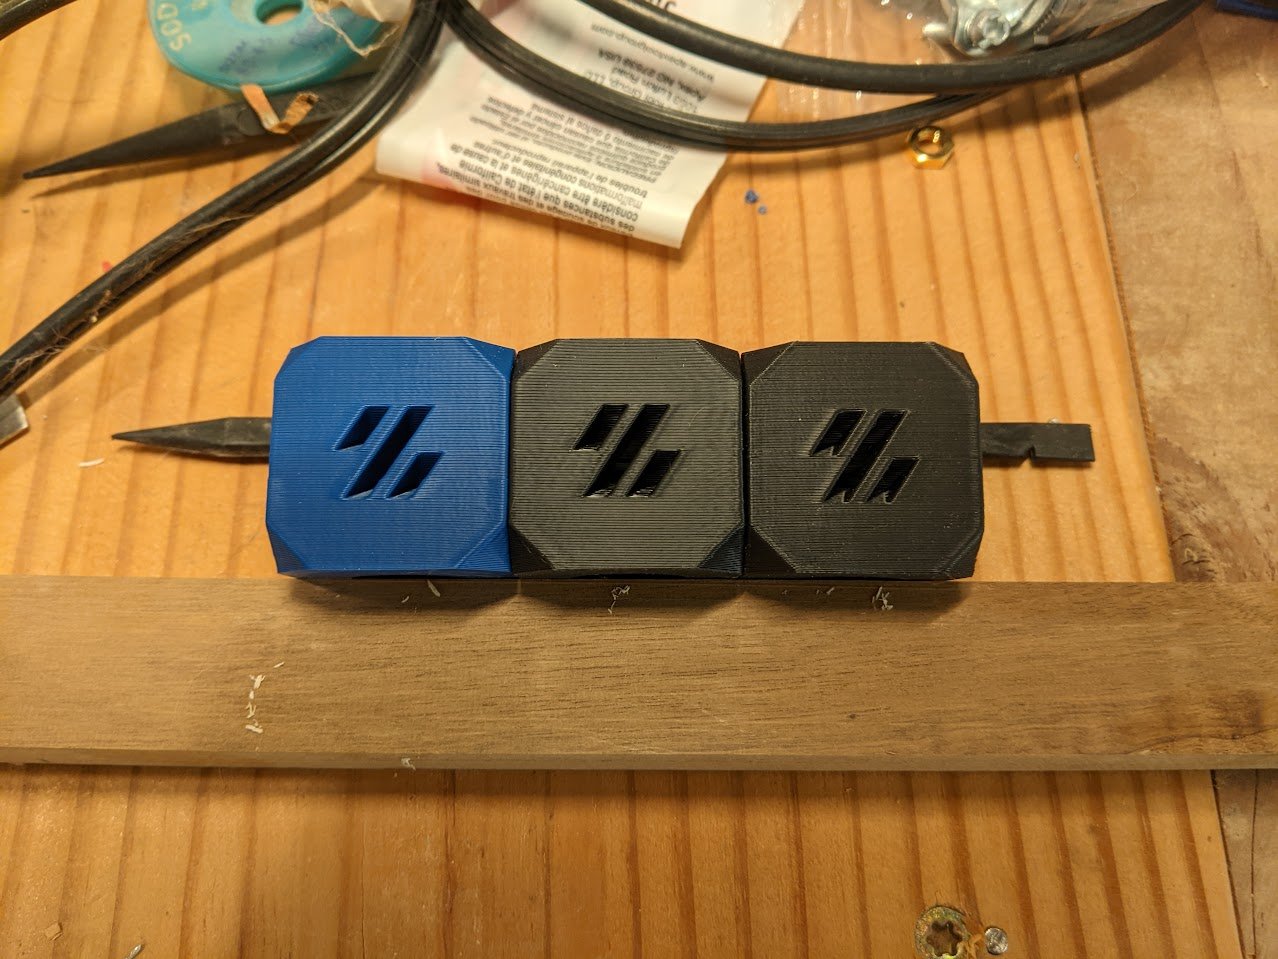
While I acknowledge the expectations Ellis tries to set, all the youtubers out there have me chasing a dragon looking for better and better layer aliment on my z-axis. I suspect (at least) one of you will come out of the woodwork and say your printer has better aligned layers than mine too 😭 I’m certainly not alone, but even in that thread you can find some people claiming that not everyone experiences the issue
So far, I’ve been through three iterations on my CW2:
- BMG gears with a grub screw
- BMG Integrated Drive Gear Assembly (IDGA). Press fit gear = no more grub screw
- FYSETC CNC Pom w/ Helical gears, since evidently the BMG gears can still be somewhat offset
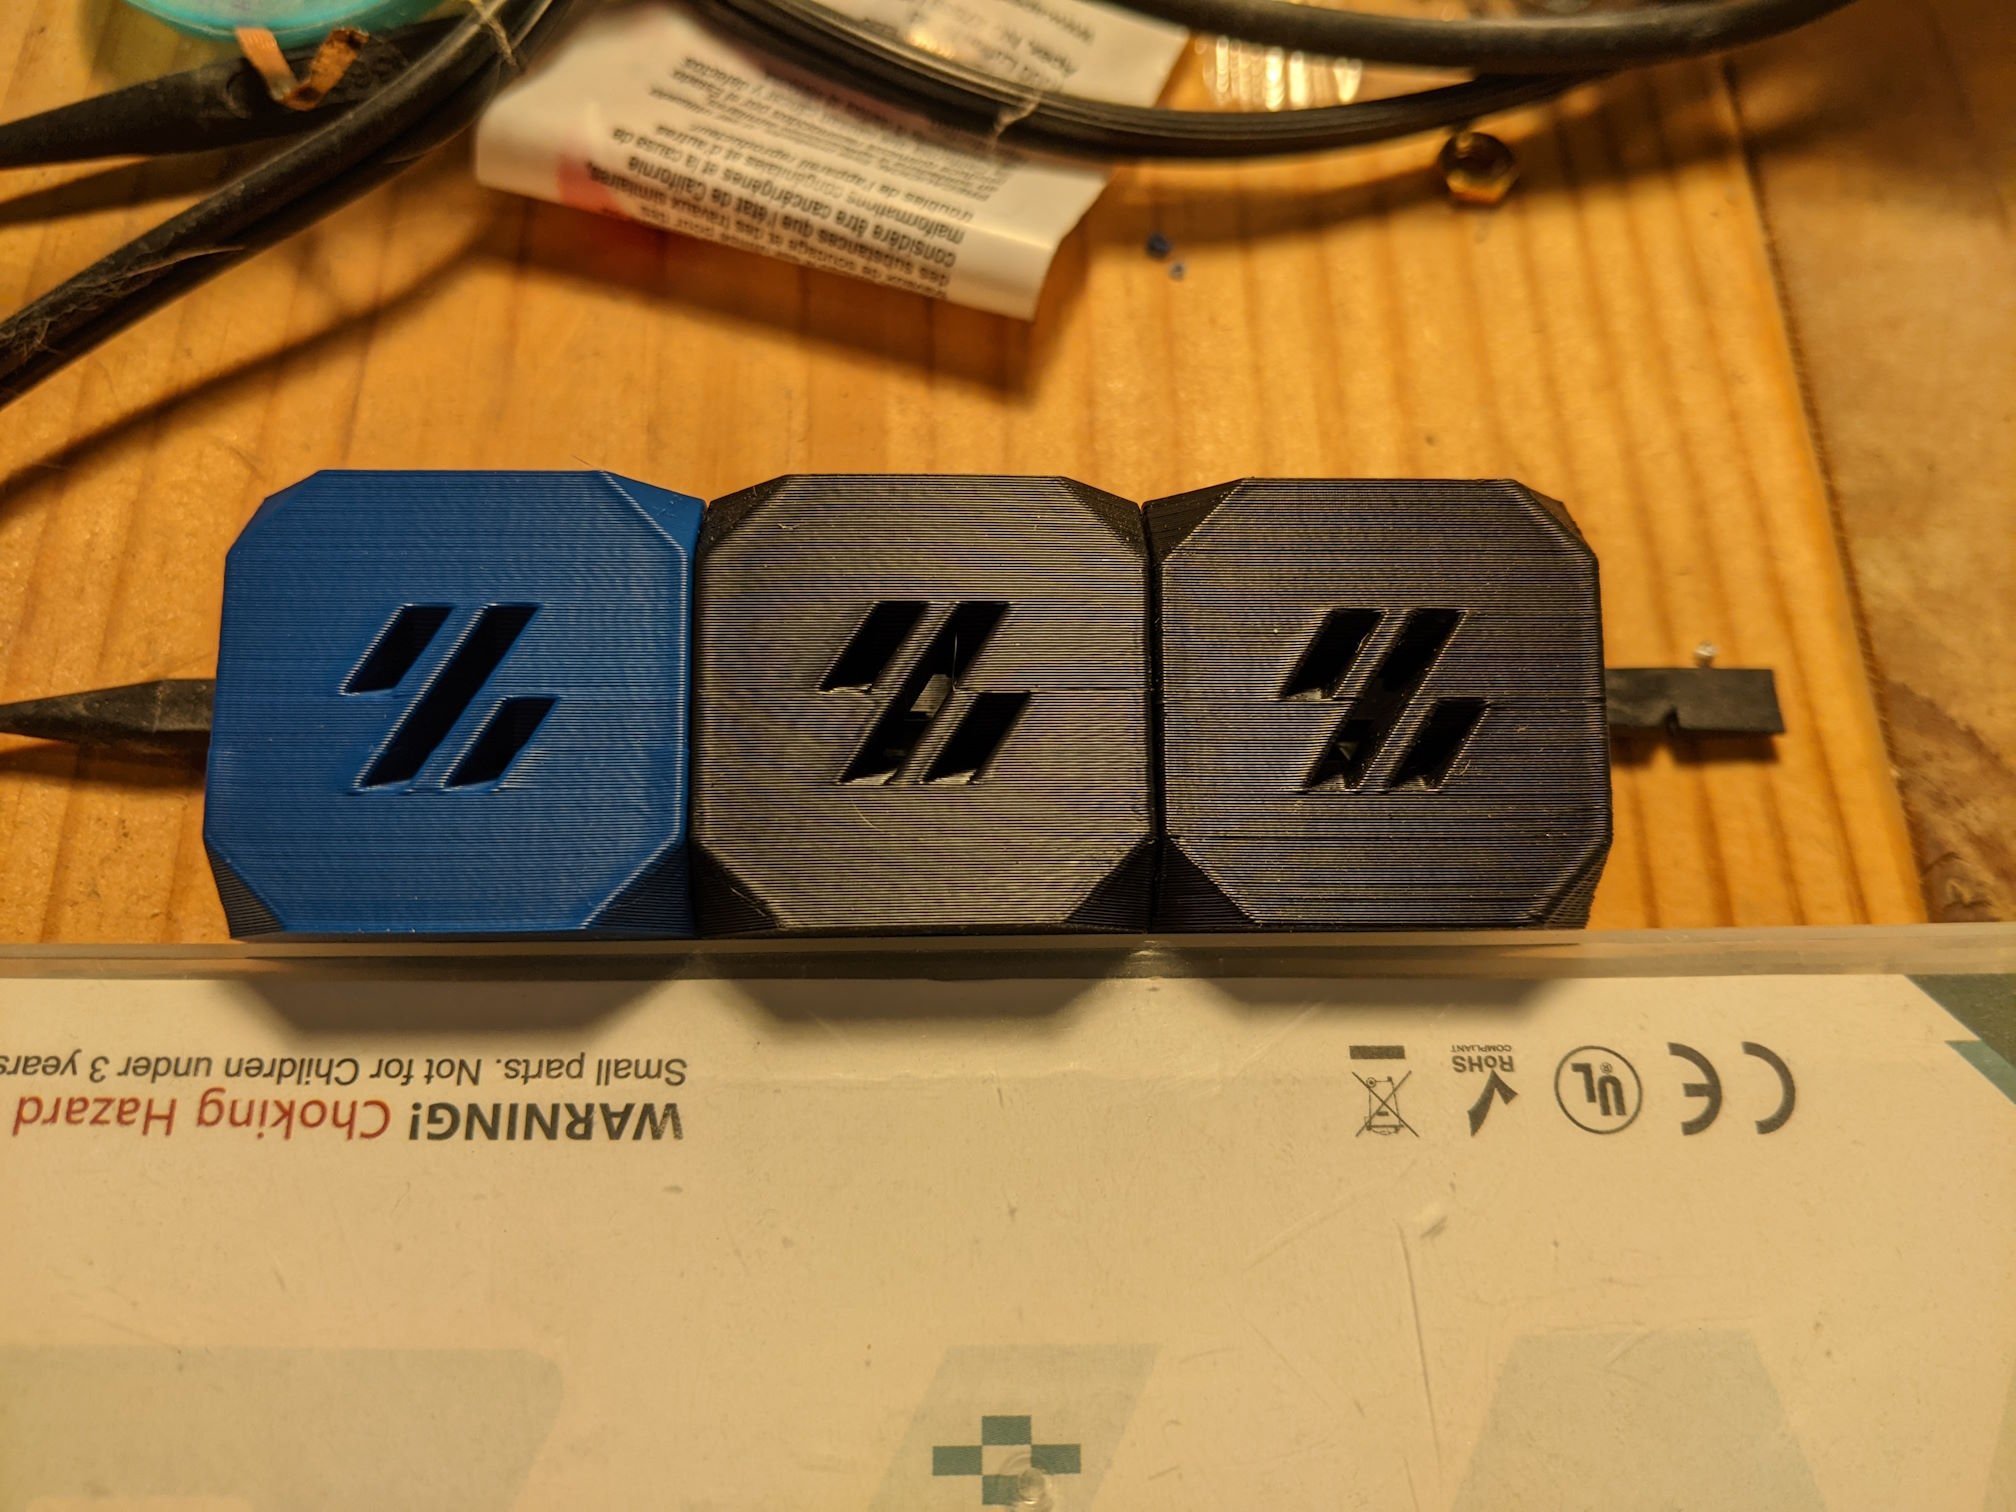
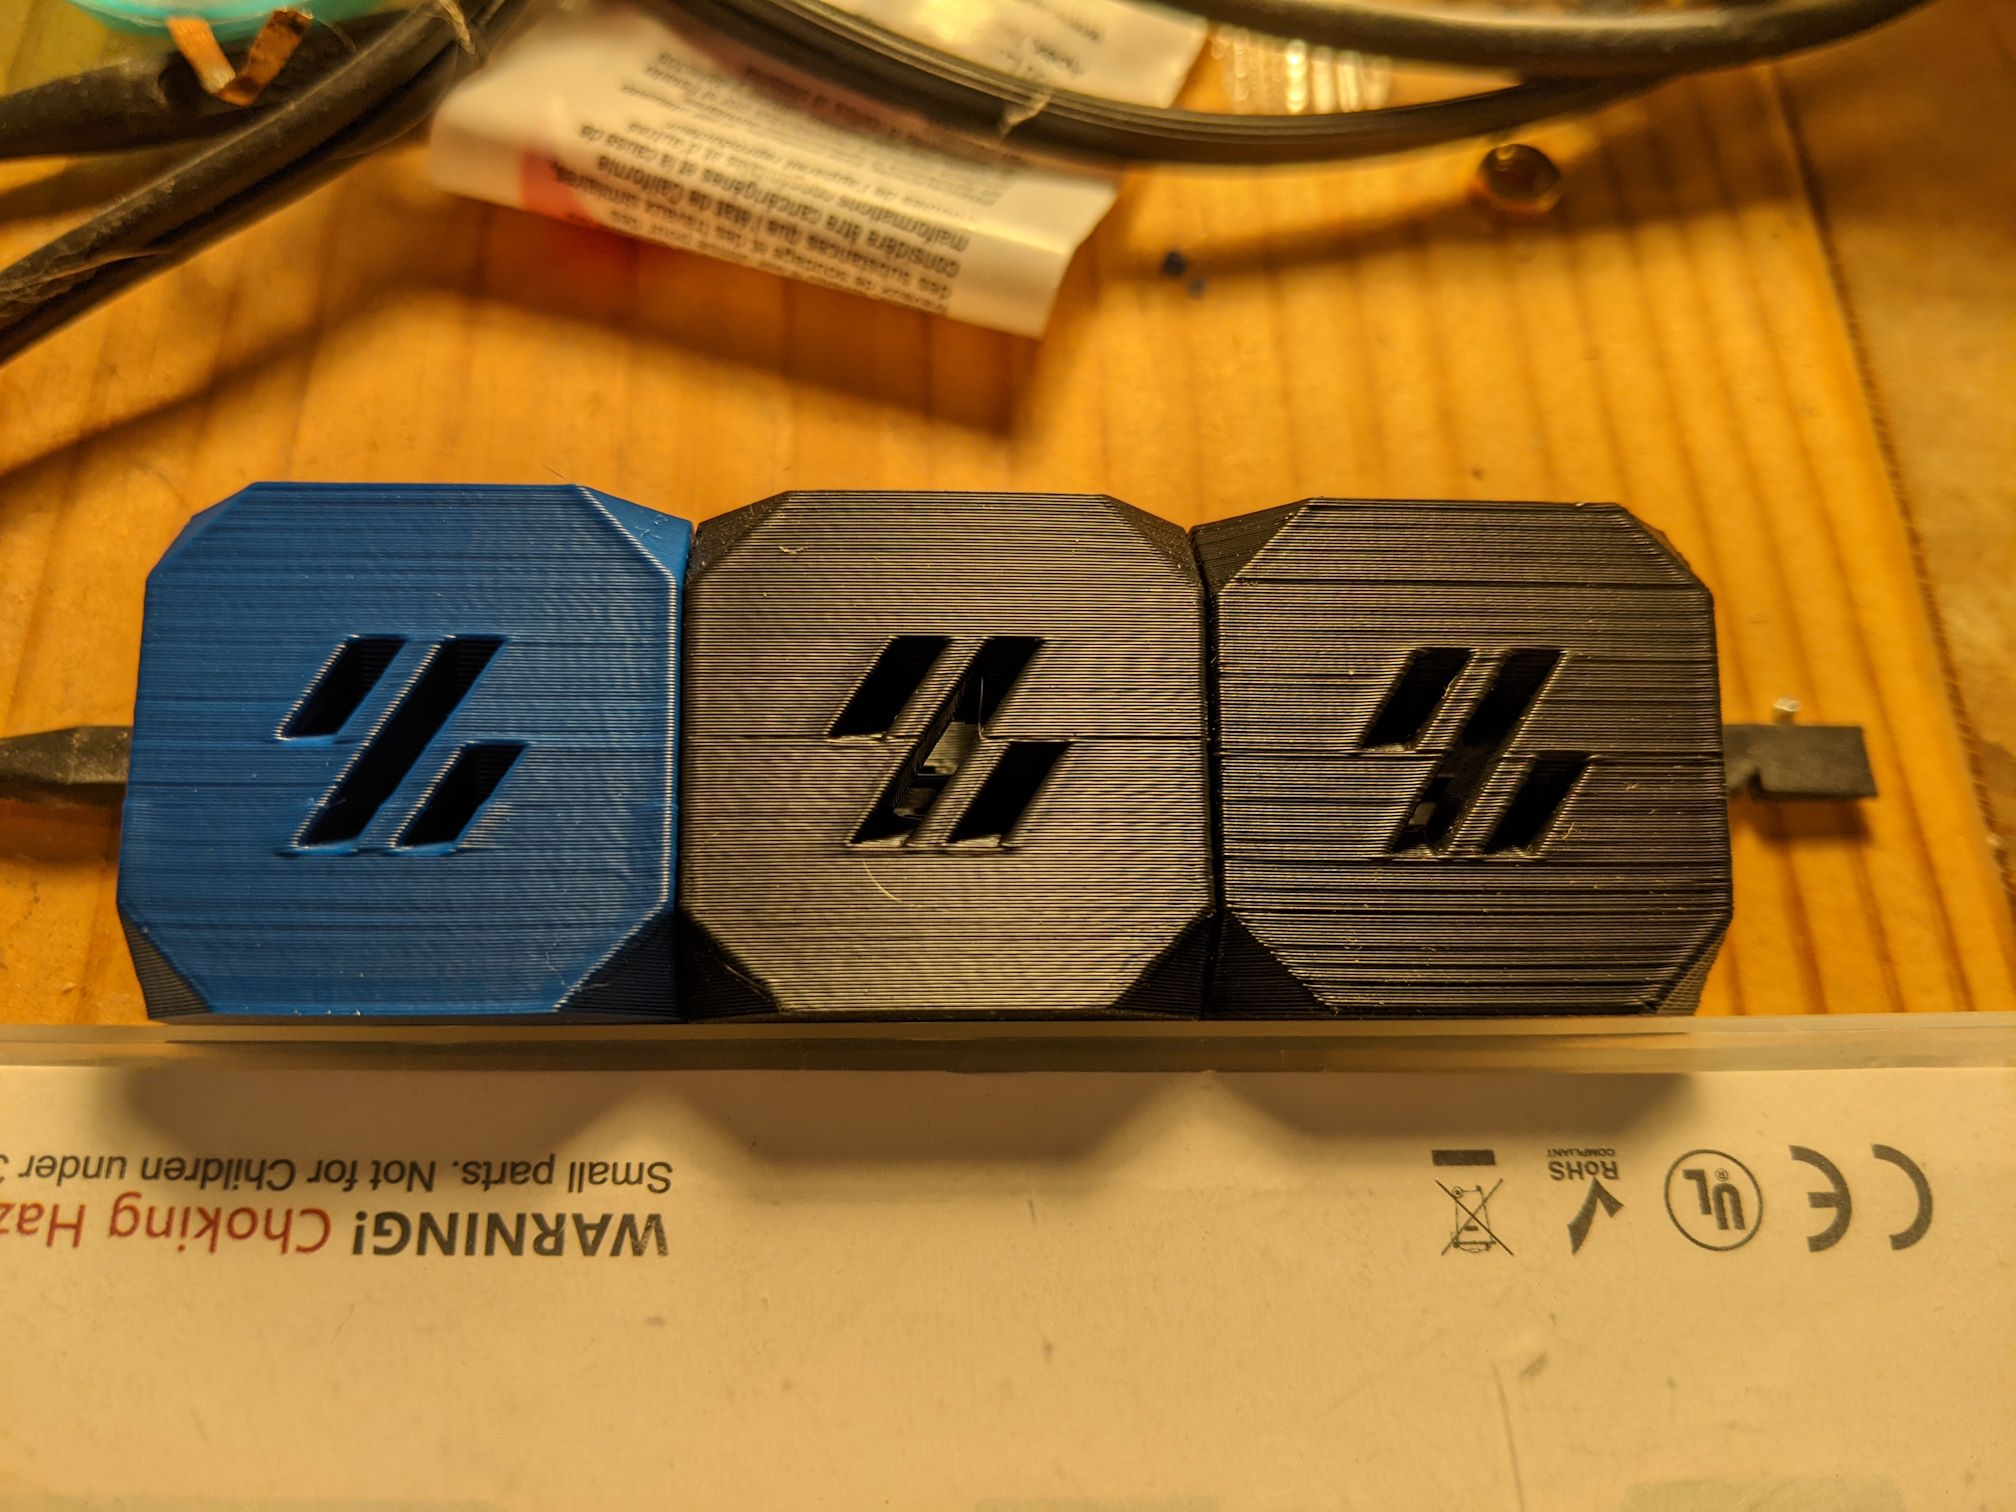
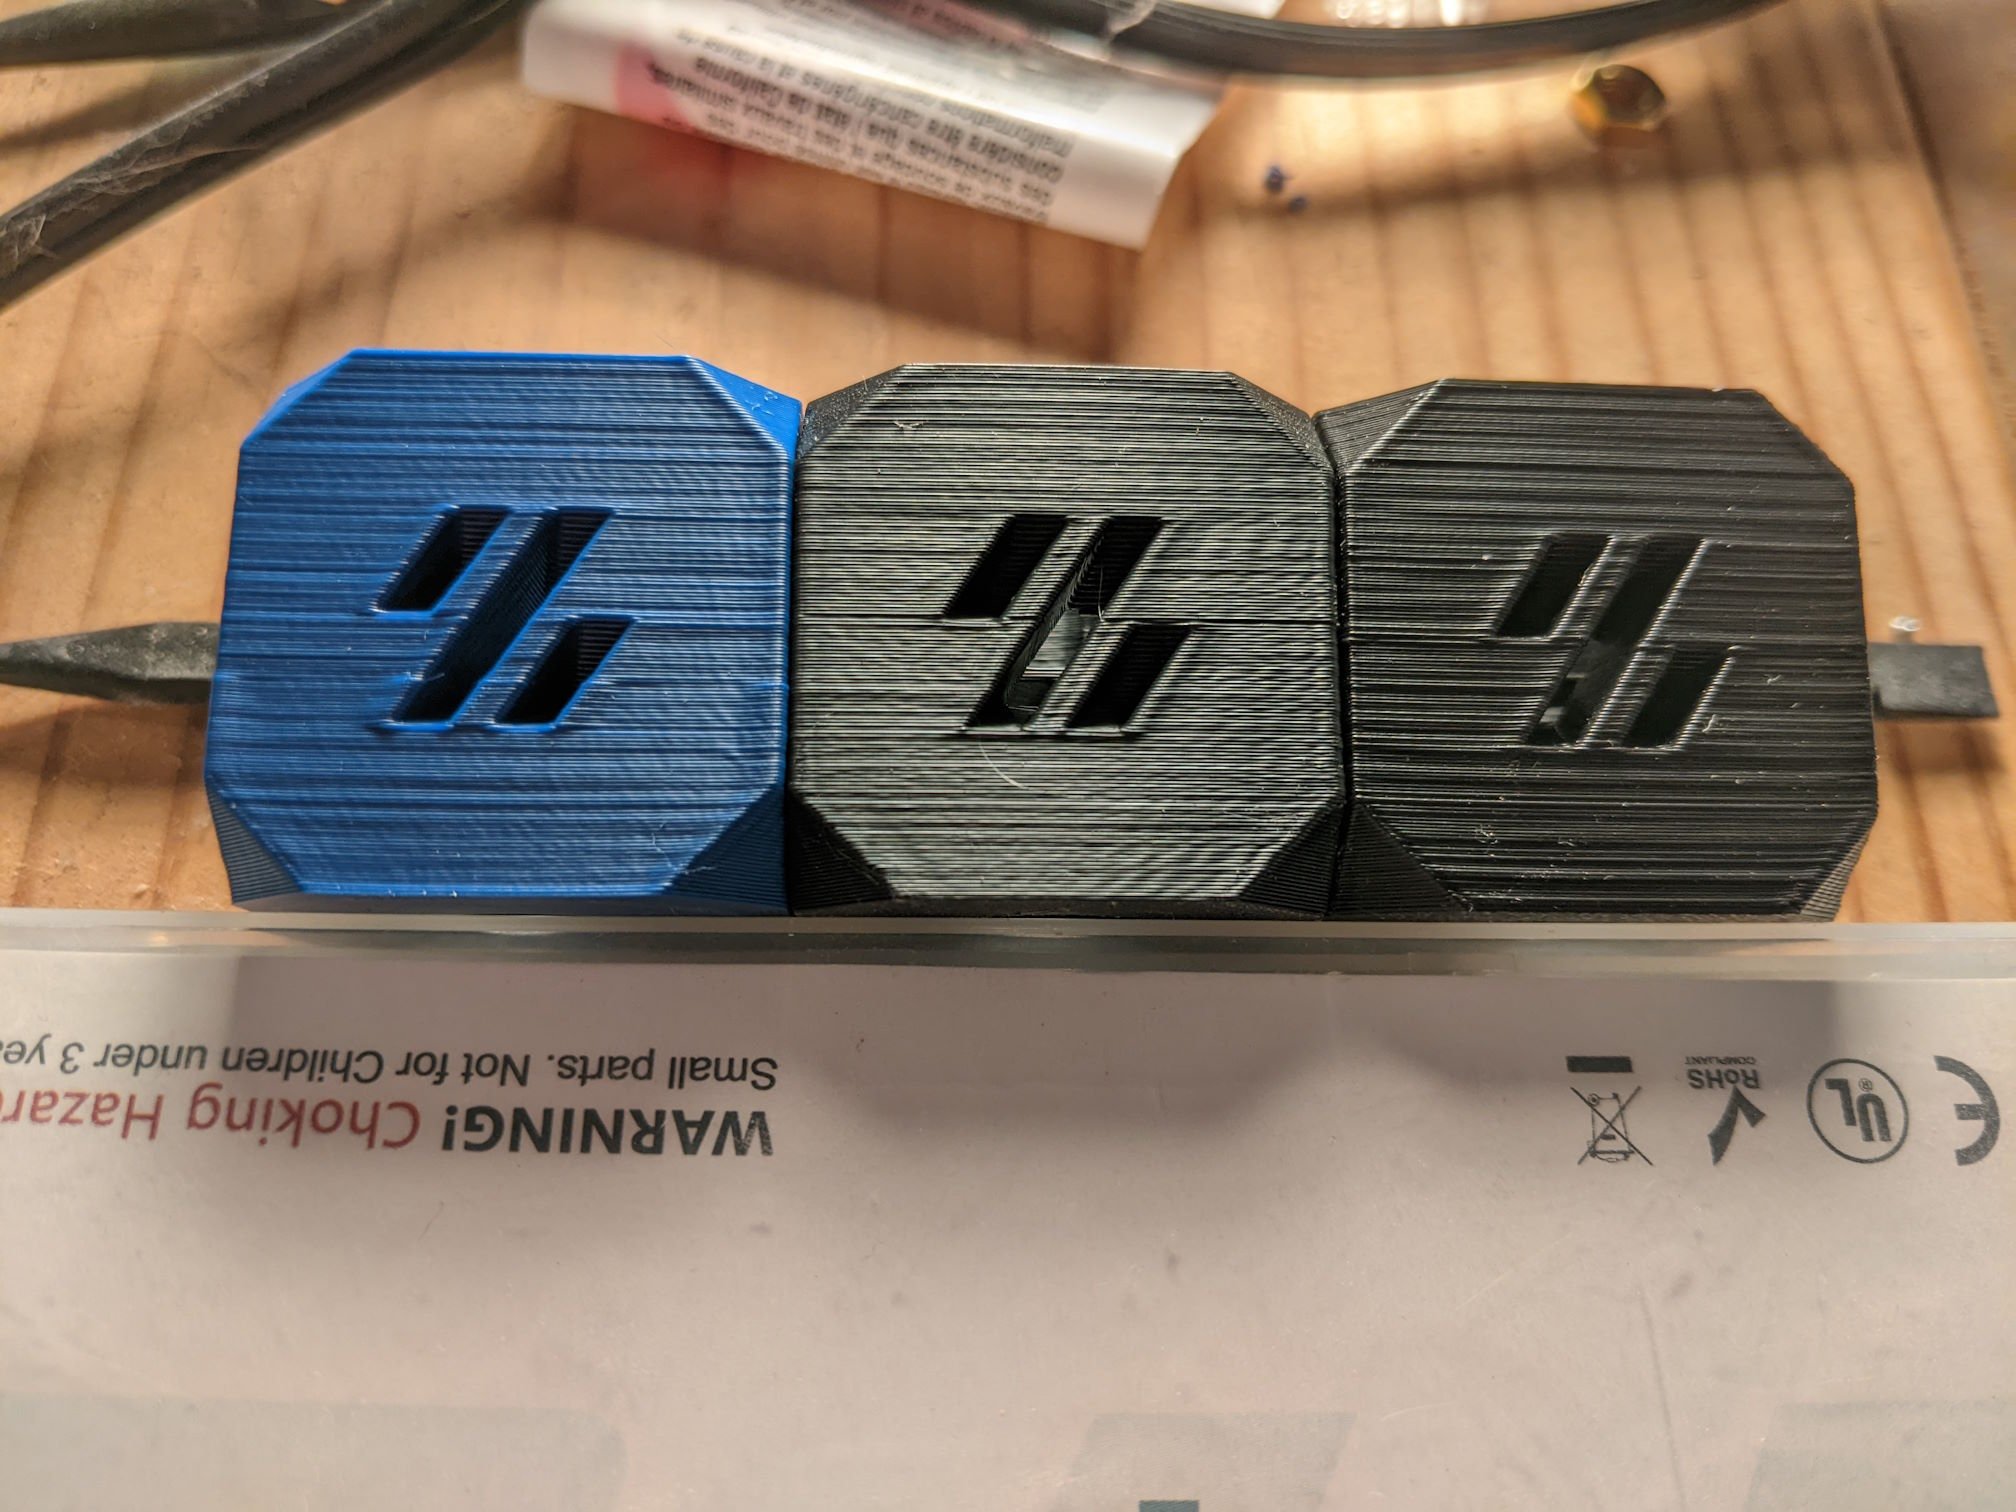
Results below with me hand holding my cellphone and moving a Pixar style desk lamp to be at a progressively steeper angle to the face of the cubes. Left = FYSTEC Pom (I also used Orcaslicer), middle = BMG IDGA, right = ‘normal’ BMGs. Note that the cubes are upside down.
Vanity shot with very soft and indirect light

Direct light, 90 degrees to the face of the cubes (basically perpendicular)

Direct light, ~45 degrees to the face of the cubes

Direct light, ~5 degrees to the face of the cubes (basically parallel)

At this point, I am going to shrug, give up, and print with fuzz (or avoid harsh light).


That’s pretty rough. A bone stock Ender 3 does better than that.
This makes me sad. The center and left cube are pretty solid in person until you get direct overhead light on them.
I just added another photo to the OP with a more diffused light sourced. It makes all three parts look pretty good.
I do kind of wonder if this is a compromised based on speed. I wouldn’t say I’m going fast, but I am running 110 perimeters and 3k accelerations. Maybe I should print a slower cube.
Other ideas are welcome :)
It may be a trick of the lighting. The picture you added looks much better. But I wouldn’t think you would be able to see that kind of errors just from light.
I’ll dig out some old prints tomorrow and see what they look like under a direct harsh light source. I say old because as soon as I started modding my printer, the quality went to removed. I may be able to print TPU and ABS now, but it definitely doesn’t look as good as before I started messing with it.
Haha, sounds like fun. This is a Voron 2.4 350, so it has the (dis)advantages of being big/having long belts and having a hot end that’s biased toward speed. I’ve run a spool of TPU through it somewhat recently and at this point I basically daily ASA. PETG parts look better, but I have not tried a PETG cube yet. Maybe I should.
Thanks for digging around for pics! I appreciate the reference.
You sure this isn’t some sort of flow issue? The z-axis should be judged based on measurements of the cube if I’m not mistaken (20mm cube = 20mm) while the look of the print is dependent on speed/flow/layer height/plastic quality. The extrusion looks pretty inconsistent, and I see a ton of ringing even without anything immediately nearby to cause it (you can see it across the entire width below the little slashes from corner to corner).
I dunno what firmware you’re using, but with klipper, resonance compensation and input shaping can help eliminate things like this.
It might be a flow issue. I recently discovered that my hot end was coming apart, which was leading to some print inconsistencies. This is my first print after fixing that, and swapping extruder gears while I was in there. I’ll have to check my belts and take another pass through Ellis’s tuning guide.
I am running klipper, and even have an accelerometer mounted to my tool head, but haven’t taken the time to put some temporary wiring in place to test/tune it. I’ll also have to do that. I do see some fine/faint ringing in the parts.
As for these prints, they were printed fairly quickly on a 0.4mm nozzle with 0.2mm layer height in Polymaker ASA.